
Testing Descript: An Avatar Video with Underlord
1: Open Descript and sign in
The landing page describes Descript as AI editing for every kind of video, with the idea that editing is as easy as typing. There is a Get started for free button, along with Sign in and Sign up in the top right. You begin by creating an account.
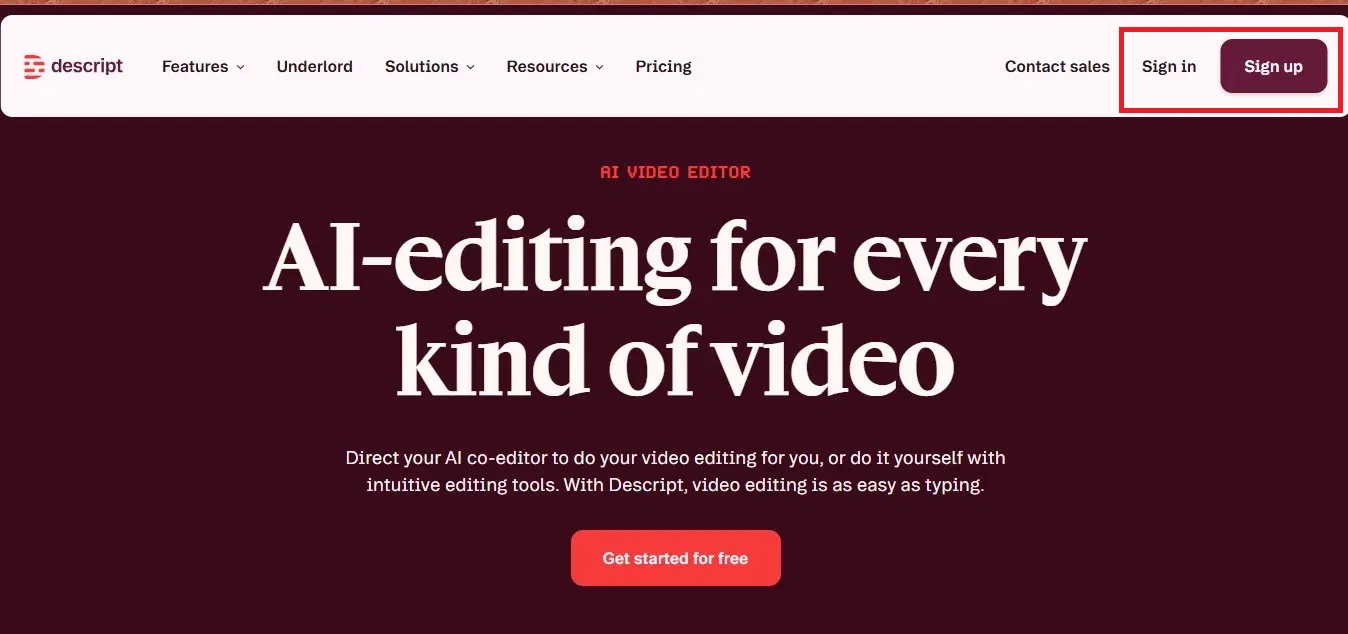
Image 1: The Descript landing page. Start with Get started for free, or sign up from the top right.
2: Pick a plan
When you sign in, Descript asks a few setup questions and then shows its plans. The Free plan costs nothing and needs no card, but it exports at 720p with watermarks and includes a small pool of AI credits. The paid plans (Hobbyist at 16 dollars, Creator at 24 dollars, and Business at 50 dollars per person each month) add more media hours, more AI credits, and exports at 1080p with no watermark. I chose the Free plan to test.
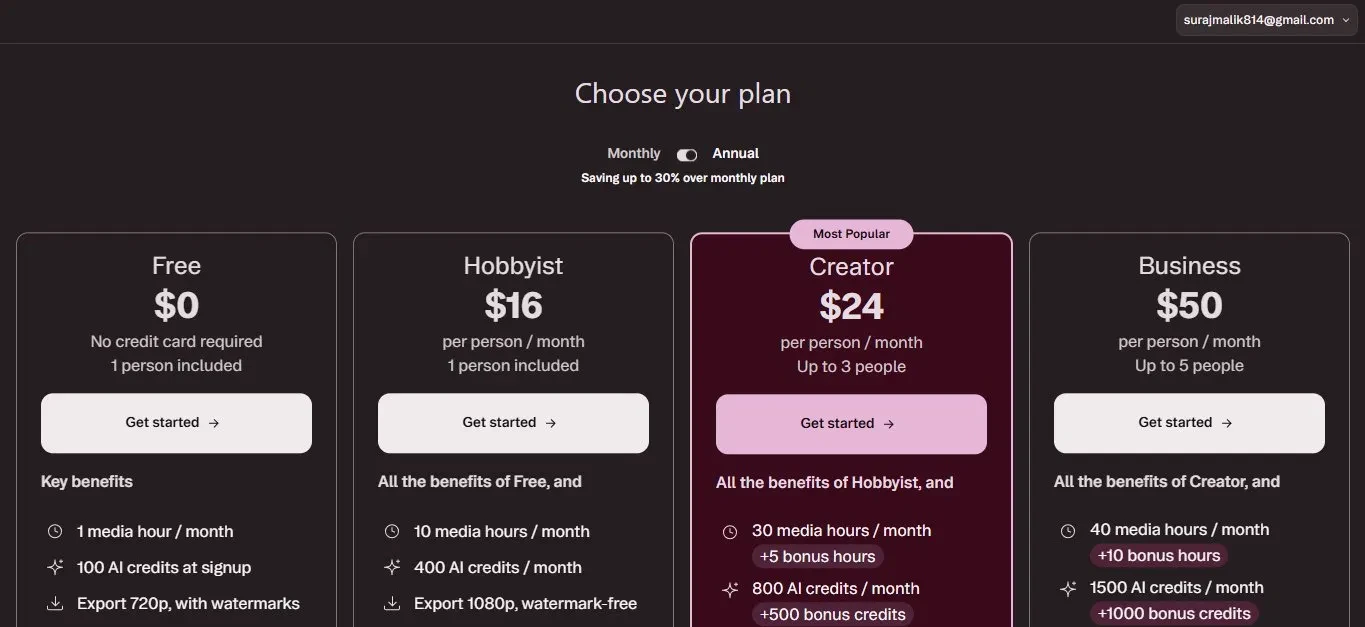
Image 2: The plan choices. The Free plan is enough to test, but it exports at 720p with a watermark.
3: Reach the console and describe what you want
Inside the app, the home screen asks what it can help you with. The left sidebar holds your drives, workspaces, and tools like Brand Studio, Media library, AI speakers, and Layout packs, and a banner reminds you that you are on the Free plan. In the prompt box you describe what you want, and there are quick actions such as Generate with an avatar and Turn slides into video. I typed a prompt to create an avatar.
| Create an avatar of Indian girl in red saree standing in middle of road in rainy weather |
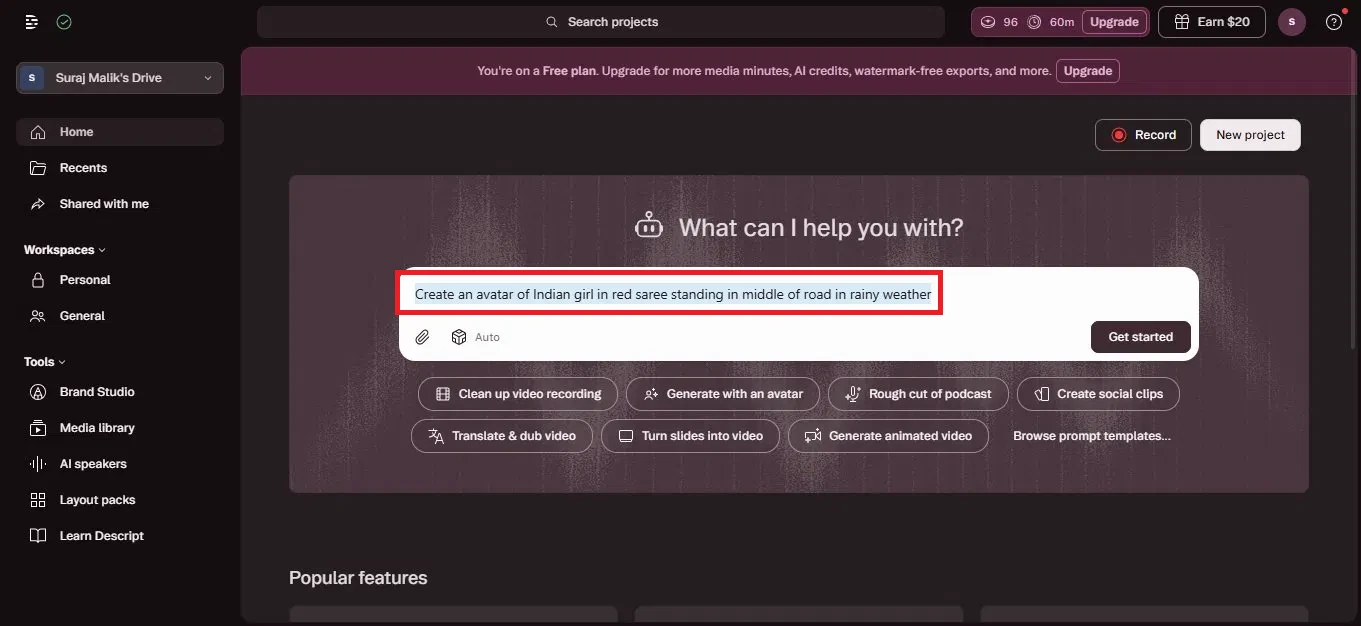
Image 3: The Descript home screen. Describe what you want in the box, or pick a quick action.
4: Underlord checks your request and offers options
When I pressed generate, Underlord opened a chat. Rather than running with the prompt straight away, it flagged a mismatch: my description was a background scene, not an avatar, since Descript avatars are talking head presenters. It then offered three ways forward, including generating the scene as a background with a talking avatar on top, generating the scene purely as visual content, or something else entirely. I chose the option that combined the scene with an avatar video.
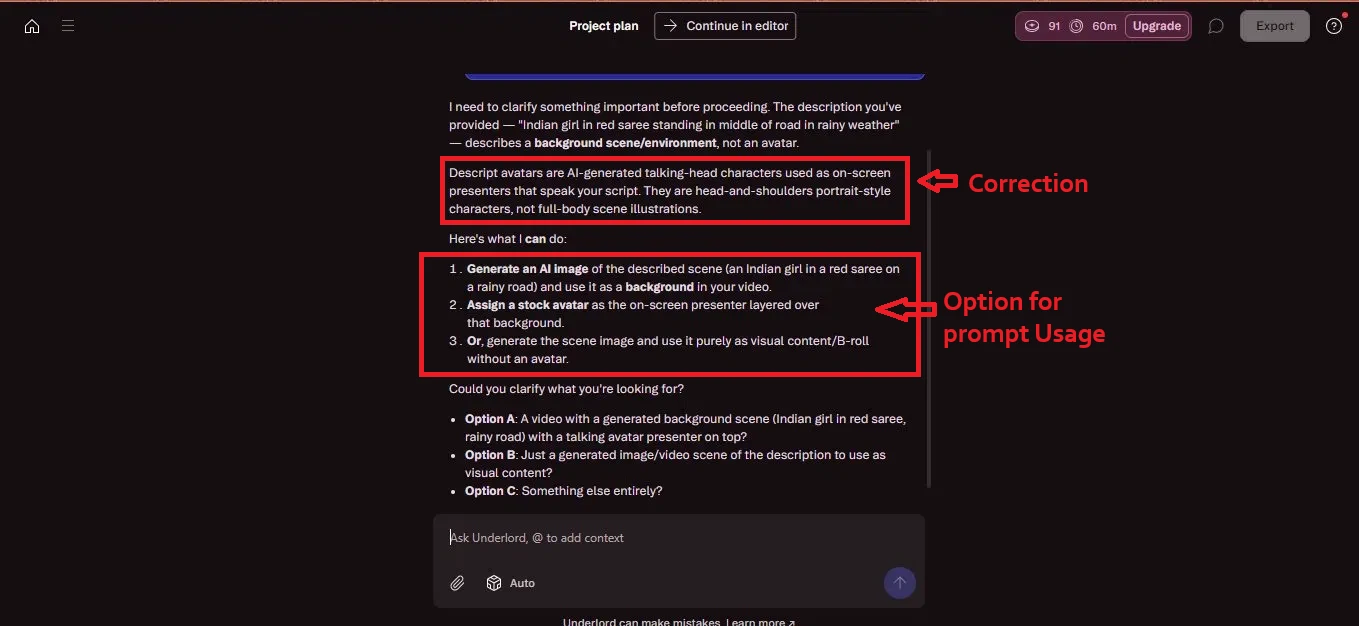
Image 4: Underlord checking the request and offering options before it builds anything.
5: It builds a plan automatically
Once I picked an option, Underlord wrote out a full plan on its own. It laid out the steps: write a short script of about thirty seconds in a conversational tone, assign an AI voice (a voice called Hope), generate a cinematic background image of the scene, add a stock avatar as the on screen presenter, build the scene with a specific layout pack, set the video to landscape at about thirty seconds, and generate the avatar video last. It then asked whether to go ahead or make changes.
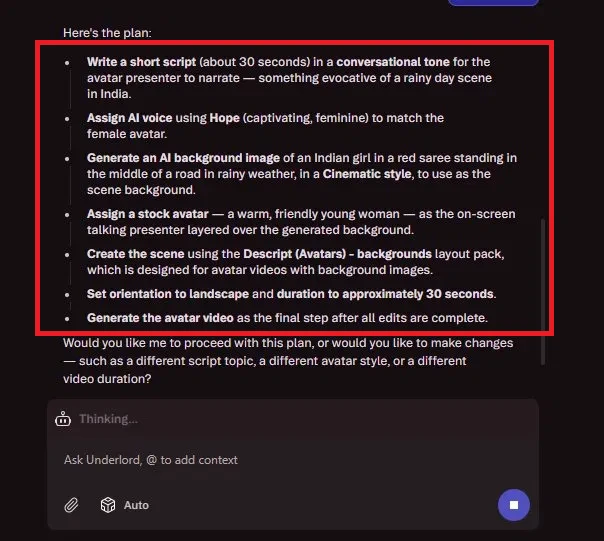
Image 5: The plan Underlord created, step by step, before asking for the go ahead.
6: Underlord builds the project in the editor
After I approved it, Descript opened the project in the editor and began building. It gave the video a title, Crimson Sari in Monsoon Stillness, and wrote the narration script in the main panel. The right side shows Underlord working through the plan, while a Create a Scene panel lets you generate media, set the layout, or add layers. The right rail holds the editing tools: Project, AI Tools, Properties, Elements, Captions, Media, and Underlord itself.
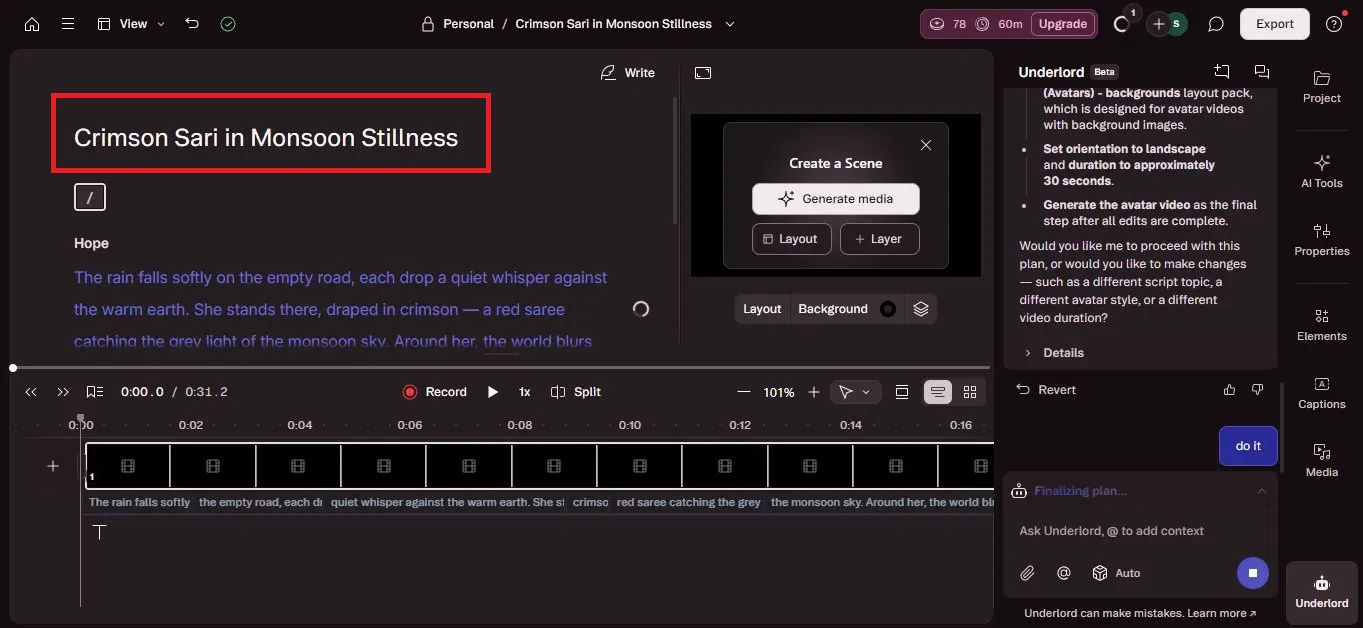
Image 6: The editor, with the generated script on the left and Underlord finalising the plan on the right.
7: The generated scene and avatar come together
The pieces then come together in the editor. The background image generated from my prompt shows the woman in a red saree with an umbrella on a rainy road. Layered with it is the AI avatar presenter, who narrates the short story that Underlord wrote from my prompt and the image. The timeline at the bottom shows the scenes and the voiceover waveform, and you can add the generated image as a new layer.
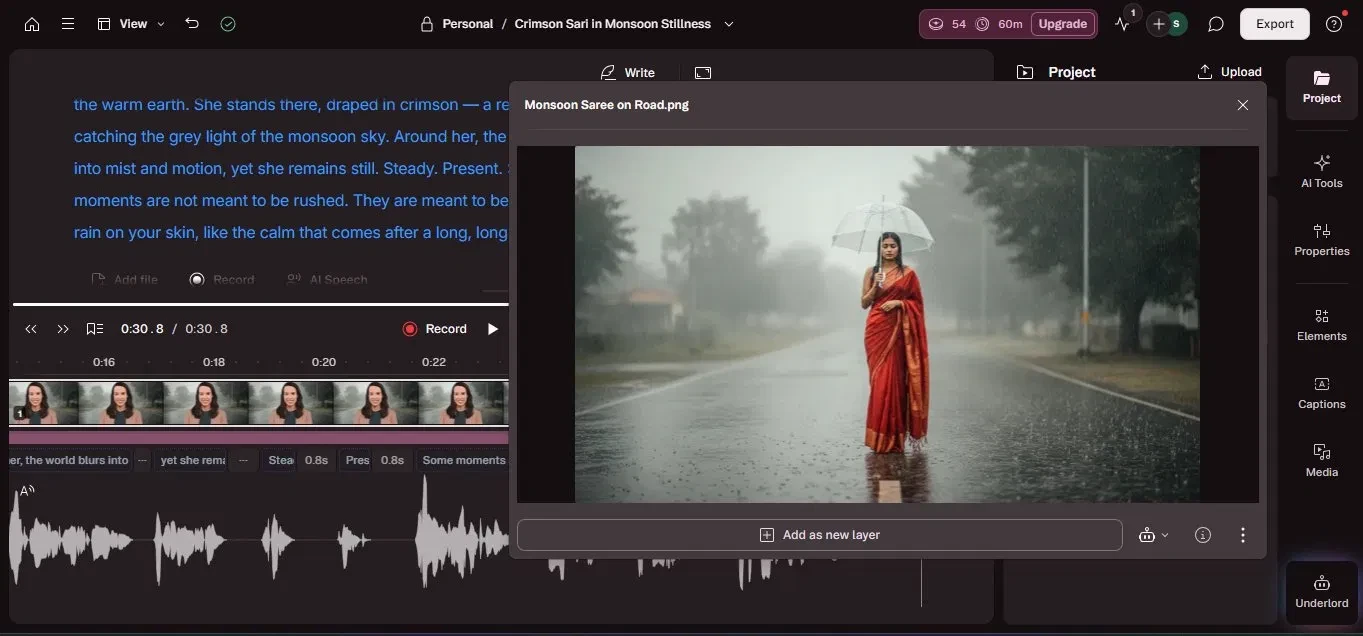
Image 7: The generated background image and the avatar presenter, with the narration on the timeline.
8: Export the video
To save the video, the Export panel opens on the right, with tabs for Video, Audio, Timeline, Transcript, and Subtitles. On the Free plan the resolution is capped at 720p, and the preview carries a Descript watermark. A note makes clear that removing the watermark needs an upgrade, and the Remove watermark toggle is locked. There is also a reminder that one avatar still needs to be generated before you publish.
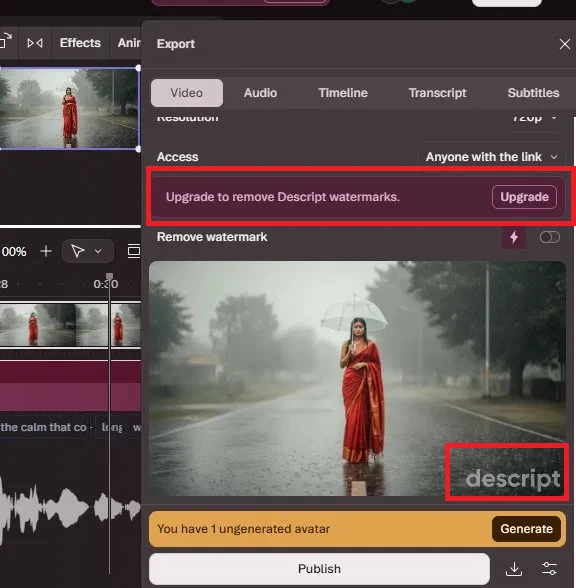
Image 8: The export panel. The free plan keeps the watermark and the 720p cap unless you upgrade.
My verdict
Descript was the most hands off of the tools I tried, and a few things stood out:
• Genuinely hands off: from one line, Underlord wrote the script, picked a voice, generated the background, and assembled an avatar video.
• It thinks before it acts: instead of blindly following my prompt, it caught that I had asked for a scene rather than an avatar and let me choose a direction.
• A real editor underneath: the result lands in a full timeline editor where you can change the script, the media, the captions, and the layers.
• Free plan limits: exports are capped at 720p with a watermark, and removing it or moving up to 1080p needs a paid plan.
Overall, Descript turned a single line into a scripted avatar video while still giving me a real editor to refine it, which made it feel more like a smart collaborator than a simple generator. The main catch is the free plan, which keeps the watermark and the 720p cap until you upgrade.