
Testing Leonardo.AI: Generating an Image
1: Open Leonardo.AI and log in
When you search for Leonardo.AI and open the site, you land on the marketing home page. It describes itself as the creator first generative AI platform and gives you a Start now button along with a Developer API option. To use the tools you need to log in, and signing in with a Google account is the quickest way to get in.
Image 1: The Leonardo.AI landing page. Click Start now, then log in (Google is the fastest option).
2: Reach the app console
After clicking Start now and logging in, you arrive at the app itself. The left sidebar holds the main areas: Home, Library, Image, and Video, with Settings and your credit balance near the bottom (150 credits here, next to an Upgrade button). In the middle there is a prompt box and a row of tools below it: Image, Video, 3D, Blueprints, Flow State, Upscaler, and Draw. You can type a prompt right here, or open the Image tool for more control.
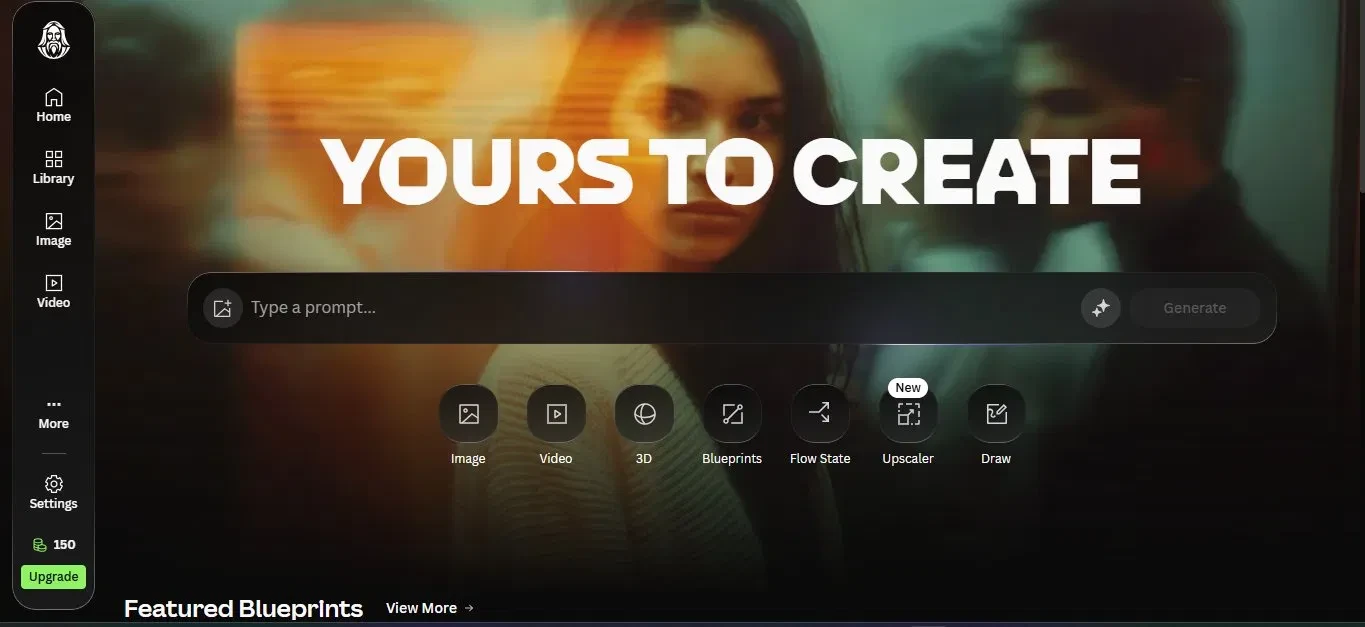
Image 2: The Leonardo app console, with the prompt box and the tool icons below it.
3: Enter your prompt and generate
I opened the Image tool, which brings up the AI Creation page. The left panel is where you set things up: the model (left on Auto), the style (Dynamic), the image dimensions (2:3, 1:1, 16:9, or Custom, with 1:1 chosen here), the number of generations, and a Private Mode toggle. A banner reminds you that you are on the free plan. I typed my prompt into the box at the top and started the generation, which finished quickly. The prompt I used is below.
| a indian teen near seaside |
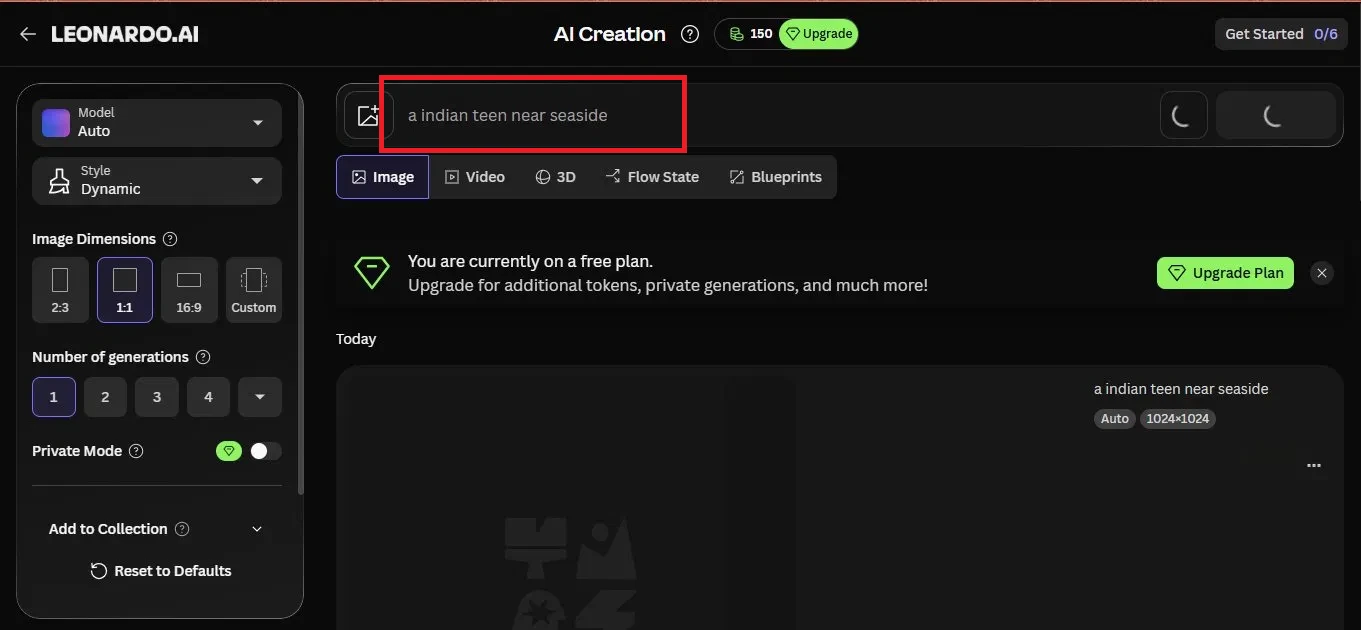
Image 3: The AI Creation page. Set your options on the left, type the prompt, and generate.
4: Review the image and its details
When the image is ready you can open it to see the full result along with its details. The panel on the right shows who generated it, the full prompt (here expanded into a longer description of the scene), the model that was used (Lucid Origin), and the size (1024 by 1024). Below that sits a set of editing actions, including Edit in Canva, Magic Layers, Remix, Upscale, and Create Video. There is also a box at the bottom where you can change the image style by typing a new instruction.
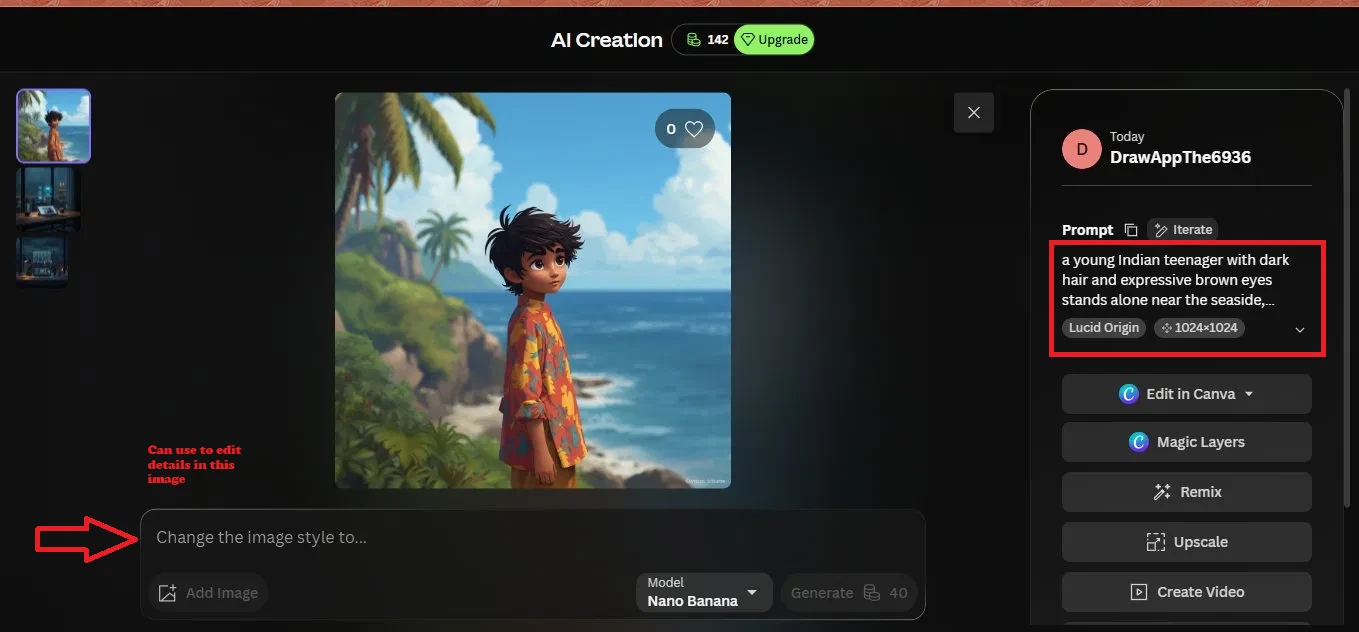
Image 4: The finished image with its details and editing tools on the right.
5: The other features it offers
Beyond the basic edits, the right panel lists more things you can do with the image: Edit in Canva, Magic Layers, Remix, Upscale, Create Video, and Use as reference for a new generation. A row of small icons at the bottom lets you download, share, delete, and copy the image. So a single result can become the starting point for an upscale, a video, or a fresh remix.
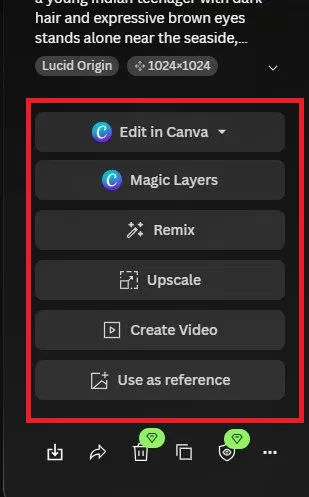
Image 5: The full set of actions, including Use as reference and the download and share icons.
6: The output
This is the final image Leonardo produced from that prompt. It came out as a polished, animation style portrait of a teenager by the sea, matching the prompt closely.
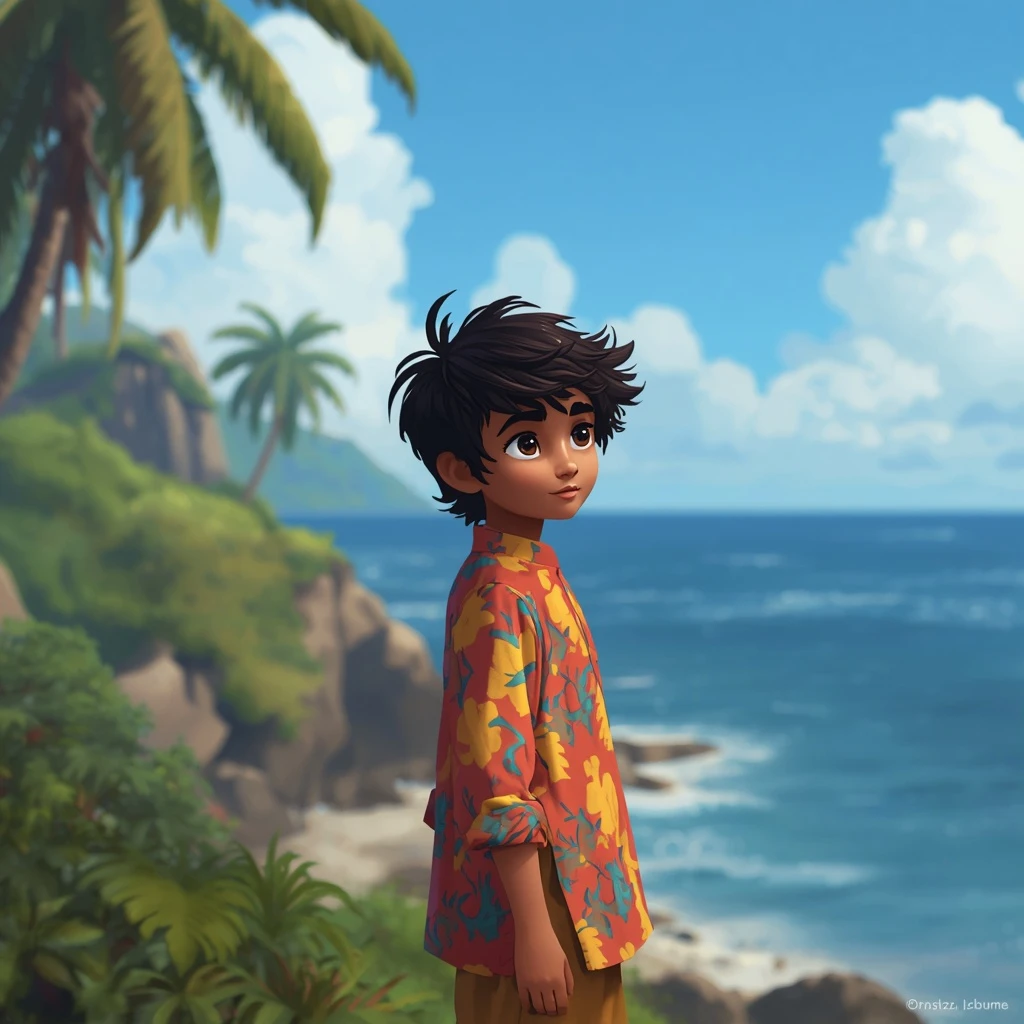
Image 6: The finished image.
My verdict
Leonardo.AI was a smooth test overall, and a few things stood out:
• Fast and easy to start: signing in with Google was quick, and the image generated in very little time.
• A useful free allowance: the free plan came with 150 credits, enough to test several generations without paying.
• Real control before you create: the model, style, aspect ratio, and number of generations are all adjustable on the left panel.
• Plenty to do afterwards: the result panel offers upscaling, remix, video, Canva editing, and using the image as a reference.
Overall, Leonardo.AI felt capable and polished. It is more than a simple prompt box, with genuine controls and a strong set of tools for what comes after a generation, and the free credits make it easy to try before deciding whether to upgrade.